Wednesday, June 30, 2010

Greek Night!

Last night we had a fabulous dinner, the theme Greek food! Falafels with traditional tzatziki sauce, Tabouli and Cucumber and Tomato Salad. My mom and I really enjoyed it and I was so glad Sarah came over because she LOVED it! Now, for Trav and Dad I can not say as much. There were actually quite funny throughout the dinner making silly faces, somehow I was not offended and my mom and I continued to crack up as we cleaned the kitchen. At one point we literally were almost on the ground laughing recalling their expressions and comments. I must say they have been great sports coming and trying my healthy dinners. Love you guys!

The Tzatiki sauce was a specialty because normally I would not serve something made with yogurt but my mom wanted me to make it just like at the restaurants and I think there are some great benefits to yogurt. I bought Fage Total 0% Greek Yogurt, 6 oz, if you're gonna make the sauce go for the real thing!

Tzatziki Sauce
yogurt, 6 oz.
1 cucumber, peeled and sliced
4 T dill
juice from a quarter of a small lemon
2 cloves garlic
Blend cucumber, dill, lemon juice and garlic together in a Cuisinart, then slowly and gently fold into a bowl with the yogurt because you don't want it to get runny. Refrigerate for an hour or so to let the flavors come out.

Now, the falafels do not exactly have a recipe. I began with a recipe for raw falafels from Juliano's Raw Cookbook that Bianca and I had previously made but did not have time to dehydrate them. If you have time and a dehydrator make these they are the best!! I added and extra can of garbanzos and about a cup of oat flour to the mix to get a thick enough consistency to make the patties, then I baked them at 425 for 30 min, 15 on one side then flip them. Be sure to check them to make sure they don't burn!

Now, I don't think this salad is Greek but it went well and it's a favorite at our house. Simple toss cucumbers, red onion and tomatoes with red wine vinegar and any oil you like. Sprinkle salt and pepper and you're good to go! The Tabouli salad is traditonally made with bulgar or couscous, but because we had multiple people at the table who are sensitive to wheat I used quinoa which is a great alternative. The salad can be made ahead of time and refrigerated.

Tabouli Salad
2 C quinoa
1 C mint, chopped
1 C parsley, chopped
4 green onions, thinly sliced
1 large tomato, diced
juice of a half a lemon
3-4 T balsamic vinaigrette
Cook the quinoa as usual. 2 C water to 1 C quinoa, let simmer for about 20 min. In a separate bowl, combine all the vegetables. Once quinoa is finished cooking add to the bowl. Then toss with the lemon and balsamic. The salad is best served cold so chill for at least an hour before serving.

My family left for Lake Almanor this morning and Bianca and I will be joining them soon, so you might not here from us for awhile! We promise to have more next week! Happy 4th of July!

Enjoy,
<3 Dani

Chia Pudding

I have been wanting to try chia seeds for a long time but wasn't really sure what to do with them. Then I saw this recipe for soaking them which makes them swell up and become like tapoioca balls. These little seeds can sure be expensive, the best place to buy them is Whole Foods in a pre-packaged large bag. If you buy in bulk and only want to a buy a little like I did it can be quite pricey. But they are really delicious and the texture makes a fun pudding, I'm going to make this again tomorrow for breakfast but with peaches!

Recipe:
2 T raw chia seeds
1 cup of raspberries
pinch of stevia, to taste
water
Place the chia seeds in a bowl and add enough water to cover. Stir the seeds so they are all mixed with the water and let sit for five to ten minutes to allow them to absorb the water and swell. I continually added more and more water and kept stirring until they had reached a nice consistency. Then I added in the stevia and the berries and stirred once again. It was a very refreshing breakfast!

Enjoy,
<3 Dani

Tuesday, June 29, 2010

Room Design

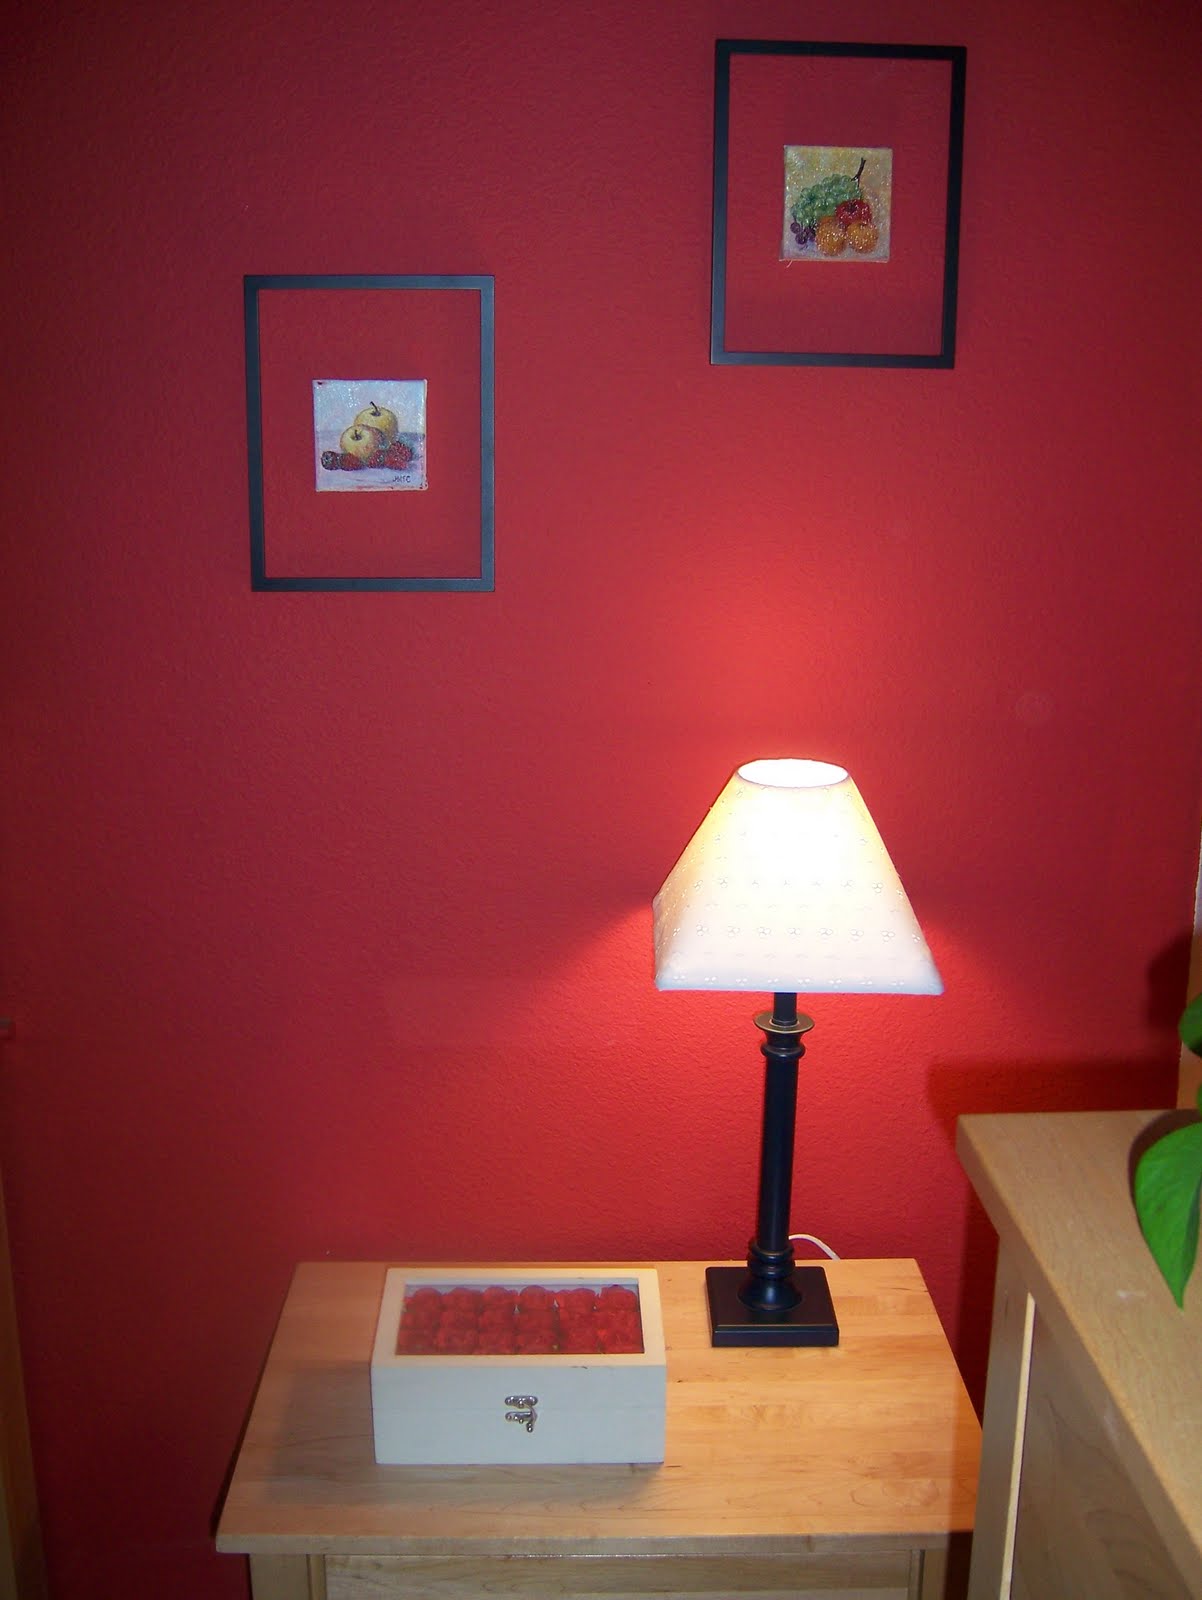
Finally, a post! And surprisingly it's not about food. I've been doing a lot of decorating of my new room, well a lot of thinking about how I want to decorate. I've only begun doing a little bit :) To start I "framed" these two small paintings my Papa did back in '74. He was a wonderful artist in his younger years and now he has passed we are all acquiring his art. My mom is putting some up in our living room and I'll be hanging more soon. I've been invisioning this idea with the frames for so long now and I love how it turned out! It's so easy, Bianca and I did it in around 10 minutes.


DIY "Framing"
Step 1: Choose your art.
Step 2: Decide what frame style, color and size you want according to the wall and the art you chose.
Step 3: Take out back end of frame and anything else, all you want is the outside framing.
Step 3: Line the frames and paintings with double sided sticky tape.
Step 4: Using a tape-measure or just simply eye-ing it (like we did) decide where you want the frames and press down on all edges to make sure they stay.

The next idea I had was to cover this old lamp shade that's plain white with a fabric. Using hot glue this project was incredibly easy and it really makes the whole lamp so much cuter! A circular lamp shade would be much easier, the one I covered has four sides so it got a little tricky. Just take it very slow and luckily with hot glue you can always pull it off.

DIY Lamp Shade Covering
Step 1: Laying the fabric on top of the shade cute a huge circle out around the shade making sure you'll have plenty to cover it.
Step 2: Choose one end to start on, turn the shade upside down while holding the fabric in place and begin by hot glue-ing the fabric to the bottom rim.
Step 3: Going clockwise, do the same on the next rim.
Step 4: Now instead of continuing clockwise, go back and do the other side opposite the one you glued down in Step 3:
Step 5: A sort of cone may being to appear at the top now, you can cut it if there's too much extra fabric. On this last side of the shade You're going to cover with one end of the fabric like all the other sides, cut off any extra fabric at this point. Taking the other side of fabric now you want to go half way to the middle of the last side of the shade then fold about an inch under and glue down.
Step 6: Now for the top. In order to glue it under, you'll need to cut slits about 5 or 6 all the way around. Then simple glue the flaps down on the inside of the shade.

This is such a great and easy way to make a change to your room or to cover up an ugly lamp shade. My mom wants me to do this ugly old shade we have in our family room now!

Have fun,
<3 Dani

Tuesday, June 22, 2010

Polenta with Zucchini and Sun-Dried Tomatoes

Want one of the easiest dinner ideas?! Well here you go, I whipped up this dinner in no time with little effort. Polenta is one of my favorite dishes, it's best cooked home-made however it takes so much work that way. You have to stir it for about a half hour, Bianca and I would switch off when we made it like this at school. Buying it pre-cooked bypasses this whole process and you simply slice and bake. There are many pre-cooked packaged polenta in flavors that are great, such as basil and garlic. I used plain for this dinner here, but the sweetness of the sun-dried tomatoes and garlicky flavor of the zucchini made it plenty flavorful!

Recipe: Slice polenta about 1-inch thick, lay flat on a non-stick baking pan, you might want to spray it to prevent any sticking. Cook for 15-20 minutes, flipping over half-way through.
Meanwhile, cut zuchinni in thick slices, however much you desire. (I used three baby sized ones from the farmers they were so cute!). Heat oil, with one clove of garlic minced, toss in zucchini and a couple of sun-dried tomatoes. Saute until zucchini is tender.
Once, polenta is done layer slices in a bowl and top with zucchini saute. Wallah! Beautiful meal done in 20 minutes!

Enjoy,
<3 Dani

Saturday, June 19, 2010

Cauliflower-Beet Salad

This has become my latest favorite salad. I've literally eaten it for lunch three days in a row :) I tend to find something I really like and then I stick with it for a while. It's a trend with my diet. And you know how I love sharing my latest creations with you. I actually origninally got the idea from an old roommate of mine, Lindsay. I thought she had made quinoa with beets and fresh veggies, but she laughed because it was actually ground cauliflower she had to use because she ran out of lettuce! Thanks Linds!

How to prepare:
Grind desired amount of cauliflower in Cuisinart and place in the bottom of a bowl.
Slice cucumbers, tomatoes, red onion, avocado and freshly cooked beets. Toss on top.
Chiffonade basil and throw on top, use plenty, this little addition makes the whole salad wonderful!
Drizzle balsamic vinegar and flax seed oil and there you have it!

Enjoy,
<3 Dani

Thursday, June 17, 2010

"Tuna" Salad

Haha, I know it’s not really tuna but it tastes like it! This recipe is really fun and a great way to mix things up from a traditional salad, as we know this is key in not getting bored of salads, right guys!
Better than Tuna
2 cups carrot pulp (from juicing)*
2 stalks celery, chopped
½ red bell pepper. chopped
1/2 C chopped parsley
½ red onion, chopped
½ t kelp

1 T Bragg’s
1-2 T your choice of oil
Mix all ingredients in a bowl well together. Refigerate for an hour or longer to let the flavors marinade. Serve as a side dish in bowls, over fresh spinach or as a filling for lettuce wraps. Any way it’s great!
*Carrot pulp from juicing fresh carrots is the best for the tuna-like texture but processing carrots in a Cuisinart will work if you don’t have the pulp available.

Enjoy, <3>

God's Garden

Yesterday, I had the blessing of visiting a friend of mine, Rita’s garden. This place was truly beyond beautiful; I saw God’s glory in every part! My love for gardening is becoming a reality now since I’m home and can plant some veggies of my own to harvest. Rita was so great today to take time away from assisting her husband, they’re building a garage and new home all by hand from the trees on their own property. I think it’s just the greatest thing, and the best part-they give God all the credit! “Every house is built by someone, but he who built all things is God” Hebrews 3:4


Rita’s garden has a large variety of vegetables, beets, kohlrabi, kale, lettuce, spinach, carrots, zucchini, yellow squash, and that’s just the start! She has a great caged in area with two aisles of blueberry bushes, they won’t produce fruit this year because of all the pruning but the plants are thriving and very happy :)


We had planned to have me assist all summer with the garden but we realized there really isn’t much work to be done. Rita was so kind and has welcomed me to come by whenever I like. Hopefully, I can find some mornings to come and enjoy the beautiful garden while spending time with the Lord.


Learning about plants, flowers, and gardening really opens my eyes to the beauty of God’s creation. He truly was perfect in how he designed everything to work. This connection that his people were meant to have with the land he gave them is so valuable in understand more about his kingdom. Really, I’ve been realizing how so much of what happens on earth is a metaphor for greater things to come. Jesus taught so often in parables regarding sowing, harvesting and producing fruit. These simple tasks reveal truths about the nature of God and demonstrate his splendor. I feel such a closeness to Him while I am working with his creation. "And the LORD God planted a garden eastward in Eden; and there he put the man whom he had formed." See guys, were meant to be in the garden! Basically, I want everyone to start growing their own garden and enjoy watching the miracle of God's creation grow. Not to mention the health benefits of eating the most locally grown and organic veggies is great too.


I was at the farmer's market downtown Santa Cruz yesterday as well and they had a stand with plants, so I grabbed Sun Gold and Brandy Wine tomatoes, Diva Cucumbers, and Italian Bell Peppers. So I've got my own little garden started, very little considering I don't have any beds yet just pots. Baby steps right? If you're just starting with gardening herbs are really easy, small and super fun because you can just go right out and snip some off for cooking! Alise informed me today that Costco is selling a 6 pack for $11! Hurry because you know how fast Costco sells out of things!

Thank you Rita, you are truly a blessing!

<3>